Installation
After booting into the live system, you will see a dialog box asking you to whether to start the installer, or continue with the live system.
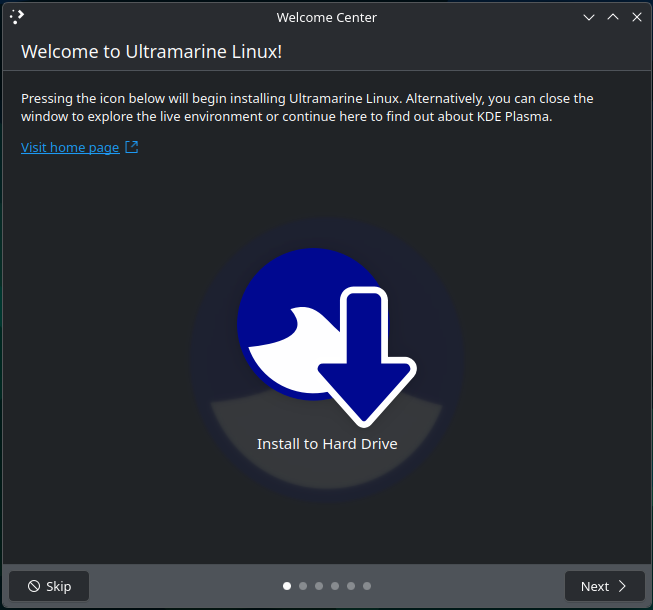
You can pick whichever you want, and you’ll be able to start the installer later by opening the Install to Hard Drive application.
To start the installation, click on the Install to Hard Drive button, or open the Install to Hard Drive application.
The Anaconda Installer
Ultramarine currently uses the Anaconda Installer (not to be confused with The Python distribution). This is a system installer similar to the likes of Ubuntu’s Ubiquity, or Calamares.
There has been progress to replace the installer with a custom installer, but it is very experimental and not yet ready for normal use.

After starting the installer, you will be greeted with a language selection screen. Simply choose the language you would like to use for Ultramarine Linux.
The Anaconda Hub & Spoke Model

Anaconda uses a hub and spoke model to guide the user through the installation process. You can configure your installation in any order you want, but you will need to complete all the options before you can continue.
Keyboard Layouts

Press the + button to add a new keyboard layout, then pick and search for the keyboard layout you prefer.
Once you have selected the keyboard layout, you can press the Done button on the top left to go back to the hub.
Time & Date

The Time & Date selection screen has a world map in which where you can click on your location on the map to set your timezone.
You can also use custom NTP servers to sync your time with a different server by clicking on the cog icon in the top right, or automatically set your time from your geolocation.
By default, the time is set from your IP address geolocation. If you’re using a VPN, this may not be accurate.
Storage

On this screen, you have to choose where you would like to install Ultramarine Linux. You can choose a drive to install to, then have Anaconda automatically partition your drive, or you can pick the 2 custom partitioning options.
By default, Ultramarine uses the Btrfs filesystem, which supports allocating the drive into multiple subvolumes. This is the recommended option for most users as this will allow you to back up your system as atomic snapshots, which take less space than a full data clone.
Custom Partitioning

In this mode, you can have Anaconda automatically allocate a partition for you, then you can change your mount point and file system type.
For UEFI-based systems, you will also have to set up an EFI partition (mounted at /boot/efi) for the bootloader to use.
Advanced Partitioning

In this mode, Anaconda uses a tool called blivet-gui for you to manually partition your drive. This is more akin to a standard partition editor like GParted.
You can set up your custom partitioning scheme, along with your own custom mount points and file system types.
You can also set up disk encryption using LUKS2 for extra security, but you will have to manually type in your password everytime your system boots.
Networking

On this screen, you can configure your hostname and network settings.
On live installations, you can only configure your hostname. Everything else will be configured by the Desktop’s respective network tools.
User Accounts

In this screen, you will have to configure your user accounts. Create a system account and enter in your password to continue.
You can also click on the Advanced button for a more in-depth configuration of your account, such as your user folder location, account ID, and your system group membership.
If you do not enter in a password, some apps may not work properly.
If you type in a password that Anaconda deems insecure, it will have you confirm whether you still want to use the password.
After completing your system configuration, press the Begin Installation button to continue. The installation process will start and may take a few minutes.
This process IRREVERSIBLE. If you manage to close down the installer
before it finishes, you will end up with a corrupted system.
To fix
this, you will have to reinstall Ultramarine Linux or your preferred operating
system, causing data loss.
After the installation process is complete, Anaconda will prompt you to reboot your system. Simply reboot your system to complete the installation.
Welcome to Ultramarine Linux!